Animation
OpenShot has been designed specifically with animation in mind. The powerful curve-based animation framework can handle most jobs with ease, and is flexible enough to create just about any animation. Key frames specify values at certain points on a clip, and OpenShot does the hard work of interpolating the in-between values.
Overview
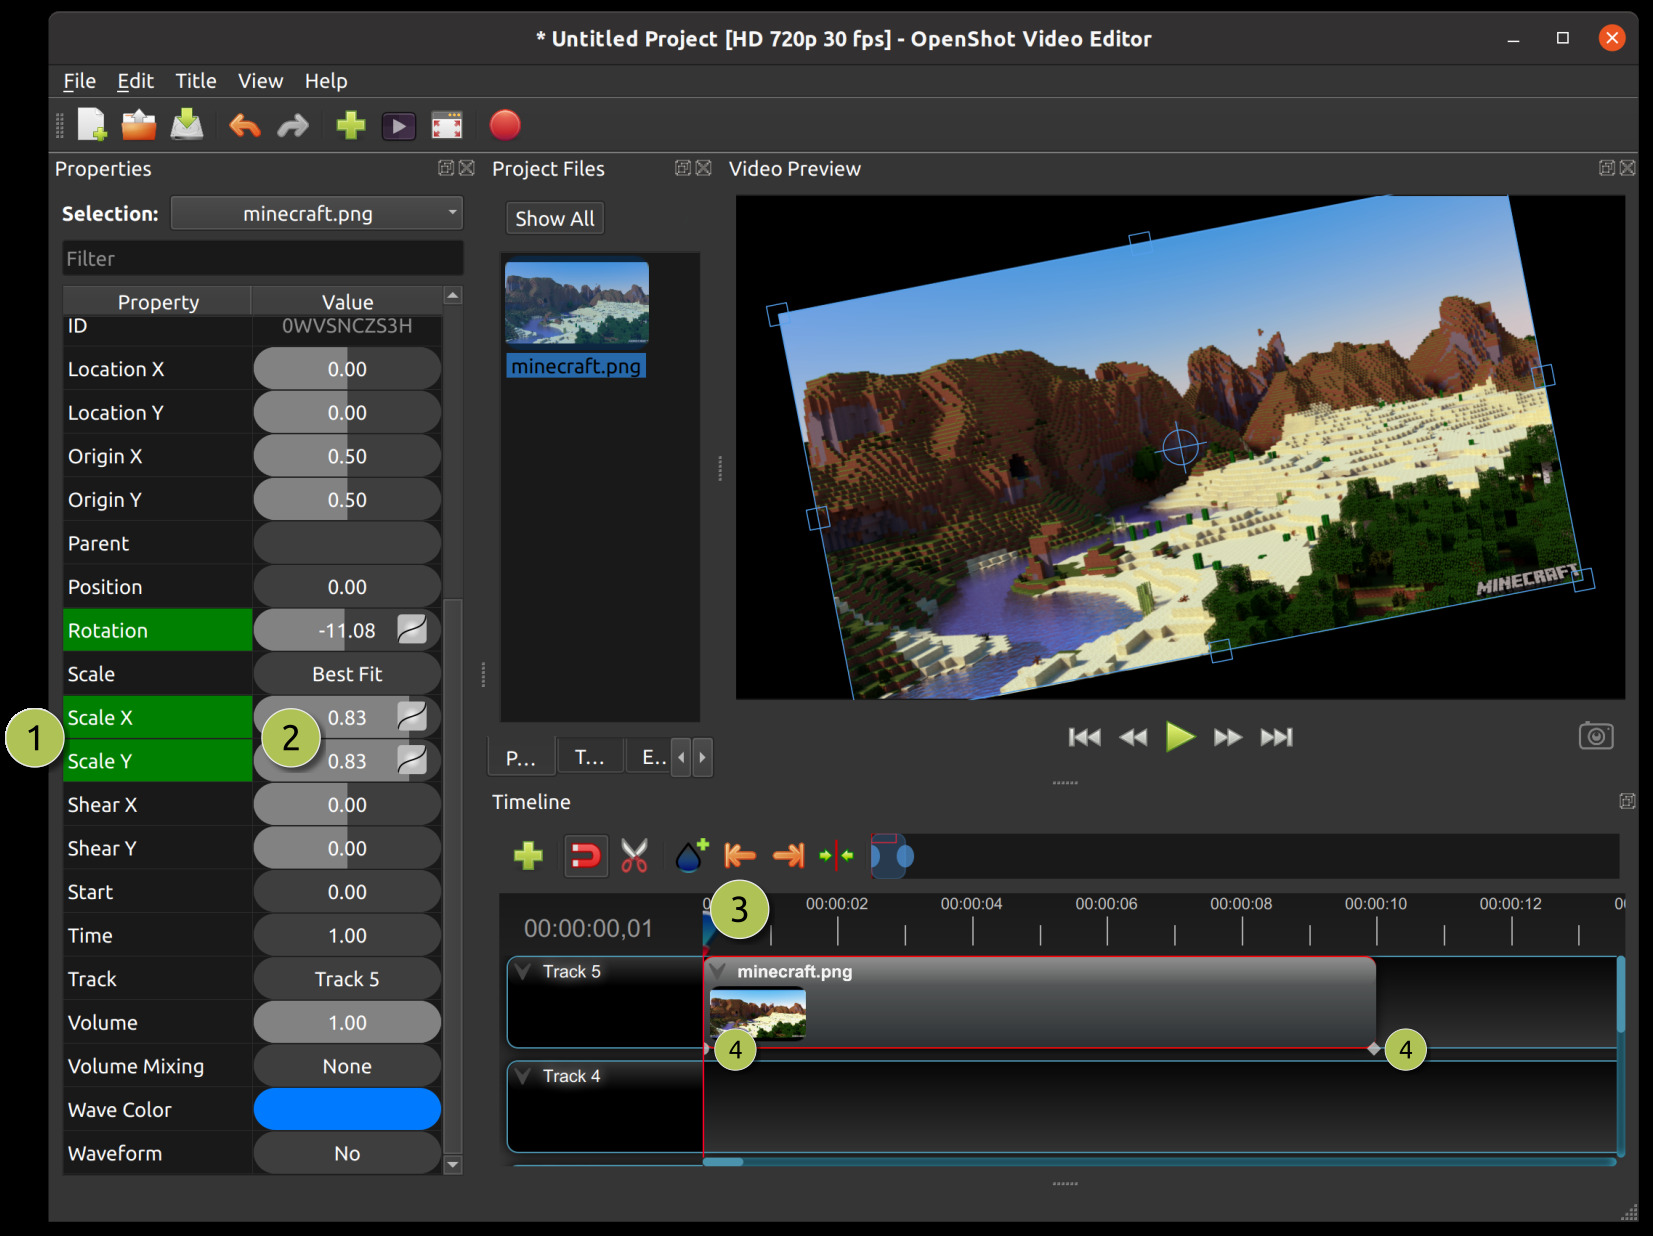
# |
Name |
Description |
|---|---|---|
1 |
Green Property |
When the play-head is on a key frame, the property appears green |
1 |
Blue Property |
When the play-head is on an interpolated value, the property appears blue |
2 |
Value Slider |
Click and drag your mouse to adjust the value (this automatically creates a key frame if needed) |
3 |
Play-head |
Position the play-head over a clip where you need a key frame |
4 |
Key frame Markers |
Colorful icons line the bottom of the clip for every keyframe (circle=Bézier, diamond=linear, square=constant). Each icon matches the color of its clip, effect, or transition. The selected item’s keyframe icons are shown brighter. Filtering the property list also filters these icons. Click any icon to jump the play-head, load its properties, and select its clip, effect, or transition. Drag an icon left or right to move the keyframe and fine‑tune your animation timing. |
Key Frames
To create a key frame in OpenShot, simply position the play-head (i.e. playback position) at any point over a clip, and edit properties in the property dialog. If the property supports key frames, it will turn green, and a small icon (circle=Bézier, diamond=linear, square=constant) will appear on the bottom of your clip at that position. Move your play-head to another point over that clip, and adjust the properties again. All animations require at least 2 key frames, but can support an unlimited number of them.
Use the Next Marker and Previous Marker toolbar buttons to step through the selected item’s keyframes. They follow whichever clip, effect, or transition is selected. When an effect is selected, navigation also stops at the start and end of its parent clip.
To adjust the interpolation mode, right click on the small graph icon next to a property value.
Key-frame Interpolation |
Description |
|---|---|
Bézier |
Interpolated values use a quadratic curve, and ease-in and ease-out. Icon: Circle. |
Linear |
Interpolated values are calculated linear (each step value is equal). Icon: Diamond. |
Constant |
Interpolated values stay the same until the next key frame, and jump to the new value. Icon: Square. |
Timing
Changing how fast a clip plays is done with the Time property and the Timing tool.
The Time menu offers presets such as normal, fast, slow, freeze, and reverse. See details in Time.
The Timing tool lets you drag a clip’s edges to speed it up or slow it down. OpenShot adds the needed Time keyframes and scales your other keyframes so your animations stay aligned. Shorter clips play faster, longer clips play slower. See more: Time.
Repeating
To play a clip multiple times, use Right-Click → Time → Repeat.
Loop repeats in one direction (forward or reverse).
Ping-Pong alternates direction (forward then backward, etc.).
Custom can add a short pause between passes, speed up or slow down each pass, including keyframes.
OpenShot writes the Time curve for you, and you can edit those keyframes just like any other. See more: Repeat.
Bézier Presets
When using a Bézier curve for animation, OpenShot includes more than 20 curve presets (which affect the shape of the curve). For example, Ease-In has a more gradual slope at the beginning, making an animation move slower at the beginning, and faster at the end. Ease-In/Out (Back) has a gradual beginning and ending, but actually goes past the expected value and then back (producing a bounce effect).
To choose a curve preset, right click on the small graph icon next to a key frame.

Image Sequences
If you have a sequence of similarly named images (such as, cat001.png, cat002.png, cat003.png, etc…), you can simply drag and drop one of them into OpenShot, and you will be prompted to import the entire sequence. OpenShot will playback these sequential images rapidly, as if they are frames in a video. The rate or speed in which these images are displayed is based on their frame rate.
NOTE: Be sure your image sequence starts at 0 or 1, or you will likely receive an error when importing it into OpenShot. For example, if your sequence starts at cat222.png, or has missing images in the sequence, OpenShot will struggle to understand the sequence. An easy work-around is to renumber the images so they start with 1.

To adjust the frame rate of the animation, right click and choose File Properties in the Project Files panel, and adjust the frame rate. Once you have set the correct frame rate, drag the animation onto the timeline.
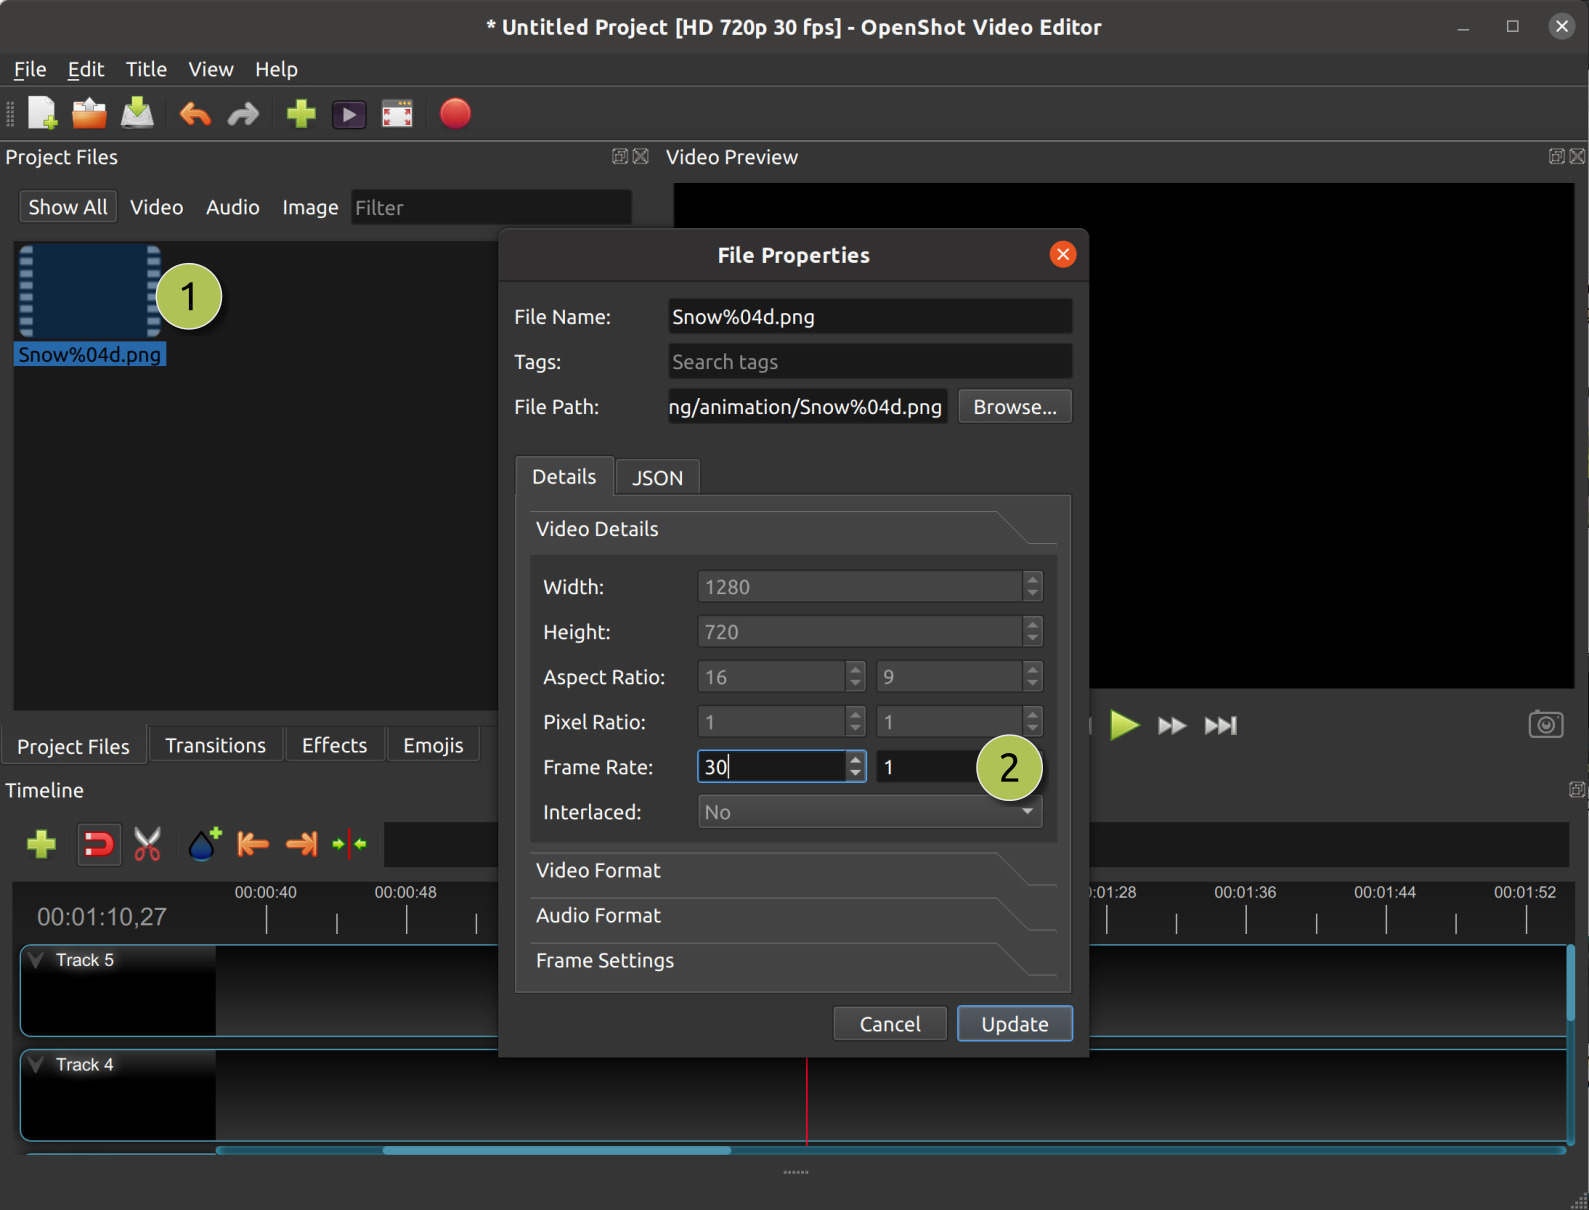
# |
Name |
Description |
|---|---|---|
1 |
File Properties |
Select an image sequence in the Project Files panel, right click and choose File Properties |
2 |
Frame Rate |
Adjust the frame rate of the animation. Typically, hand-drawn animations use 12 frames per second. |